


















How to Make a YouTube Thumbnail: Lesson 1 with Gemini Nano Banana and Canva
The first half of a clickable YouTube thumbnail without Photoshop: a fictional person from ChatGPT, a crying face from one Gemini Nano Banana prompt, background removal and right-third placement in Canva.

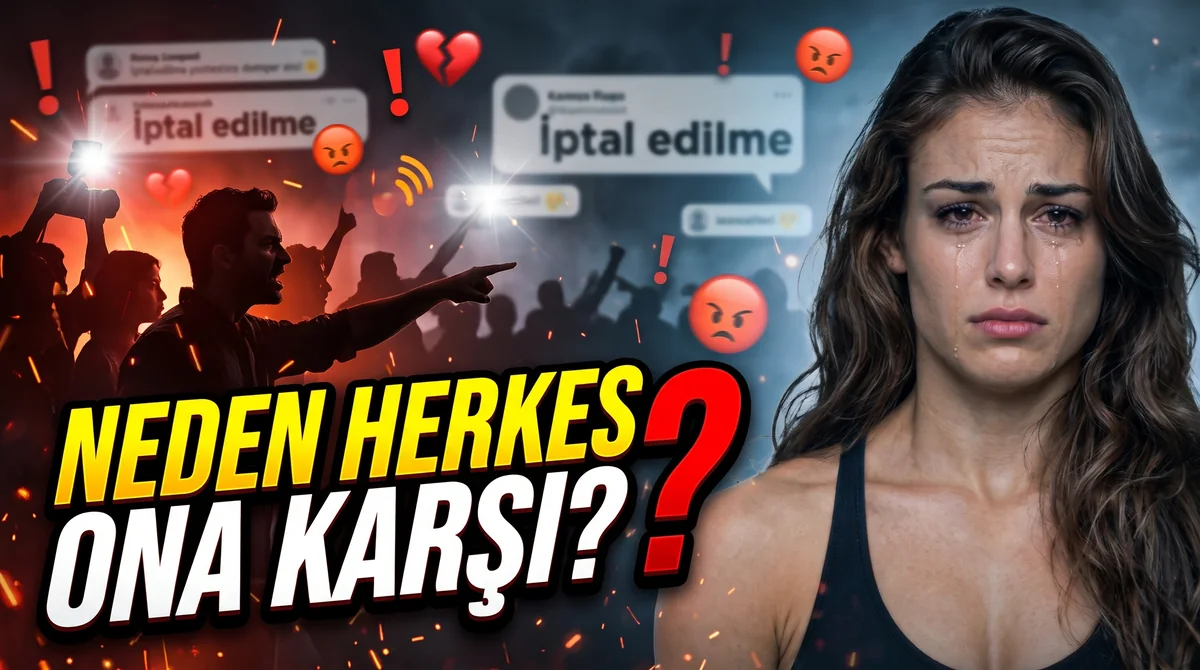
If you spend hours on thumbnails, stop. The thumbnail below came from a single prompt; Photoshop was never opened. It started as an ordinary studio photo. In this article we walk the same path step by step: starting from a plain photo, we build the first half of a YouTube thumbnail that gets clicks.
This is the written version of the first lesson in our YouTube series AI Thumbnail Lessons. The video is in Turkish and so is the interface in our screenshots, but the steps are the same in any language: Gemini, ChatGPT and Canva understand prompts written in English.
In this lesson:
- The formula of a clickable thumbnail: a face, a strong emotion, a short question and a scene that sparks curiosity.
- Generating a fictional person with ChatGPT and changing the facial expression with a single prompt in Gemini Nano Banana.
- Removing the background (remove.bg or Canva).
- Placing the face in the right third of a 1280 x 720 canvas in Canva.
Why does a YouTube thumbnail matter so much?
There used to be two ways to make an eye-catching thumbnail: Photoshop, powerful but taking months to learn; or Canva, easier but still demanding an eye and some skill. So most people either paid a designer or settled for a rushed image. Today the image tool called Nano Banana in Google's Gemini app can make edits with a single sentence that used to take hours.
YouTube shows a video to viewers first through its thumbnail and title. Say your video appears on the home page of a thousand people. How many of them click is often decided by the thumbnail alone:
Example: 1,000 impressions, 40 clicks = 4 percent click-through rate.
Same impressions, a better thumbnail, 80 clicks = 8 percent, twice the views.
On top of that, YouTube generally recommends videos that viewers click and keep watching to more people. A good thumbnail is not a one-off boost but a snowball that keeps growing.
Three tools: Gemini, ChatGPT and Canva
- Gemini Nano Banana: strongest at editing. Changing the expression, lighting or background of a photo you already have.
- ChatGPT: very good at generating a new image from scratch. We created the person in this lesson with it.
- Canva: text, final adjustments and the canvas in YouTube's size.
There is no strict rule about which tool is better. Trying a result you did not like in the other one is often the fastest route.
The formula of a clickable thumbnail
Look closely at the thumbnail above. On the right there is a strong emotion: a face in tears. On the left, a question in huge, bold yellow and white letters: Why is everyone against her? Behind it, a scene that tells the story: a crowd pointing fingers, angry face icons, broken hearts. A question pops into the viewer's head and they click to find the answer.
We made a second thumbnail with the same person, this time in a semi-cartoon style. Using an illustration instead of a photo has an advantage: the thumbnail reads very clearly even on a small screen and stands out among photo thumbnails in the feed. For this second one we wrote just one more sentence to Gemini; we will see that sentence in later lessons.
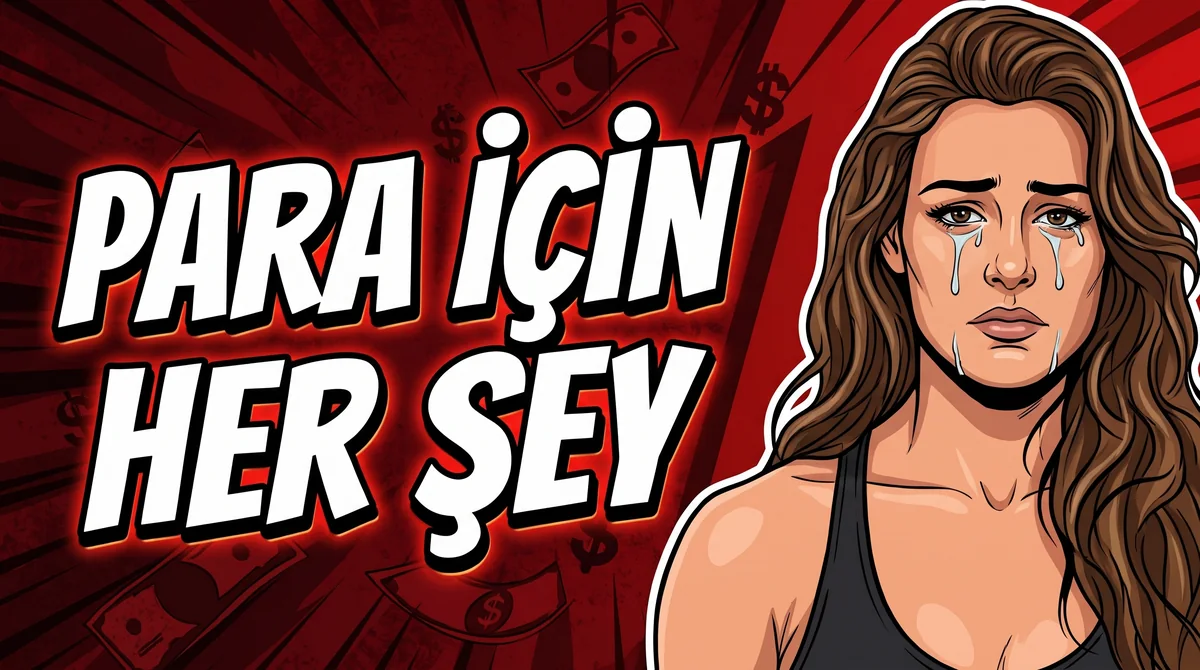
Step 1: Find the right photo
The face is the star of the thumbnail, so the photo should be sharp and well lit, with the face turned towards the camera. A plain, simple background makes your job much easier. You have two options: use your own photo, or, like us, have ChatGPT generate a person who does not exist. We described it like this:
To ChatGPT: A female fighter with long wavy hair, serious expression, looking at the camera, on a grey studio backdrop. She should not resemble any real person.
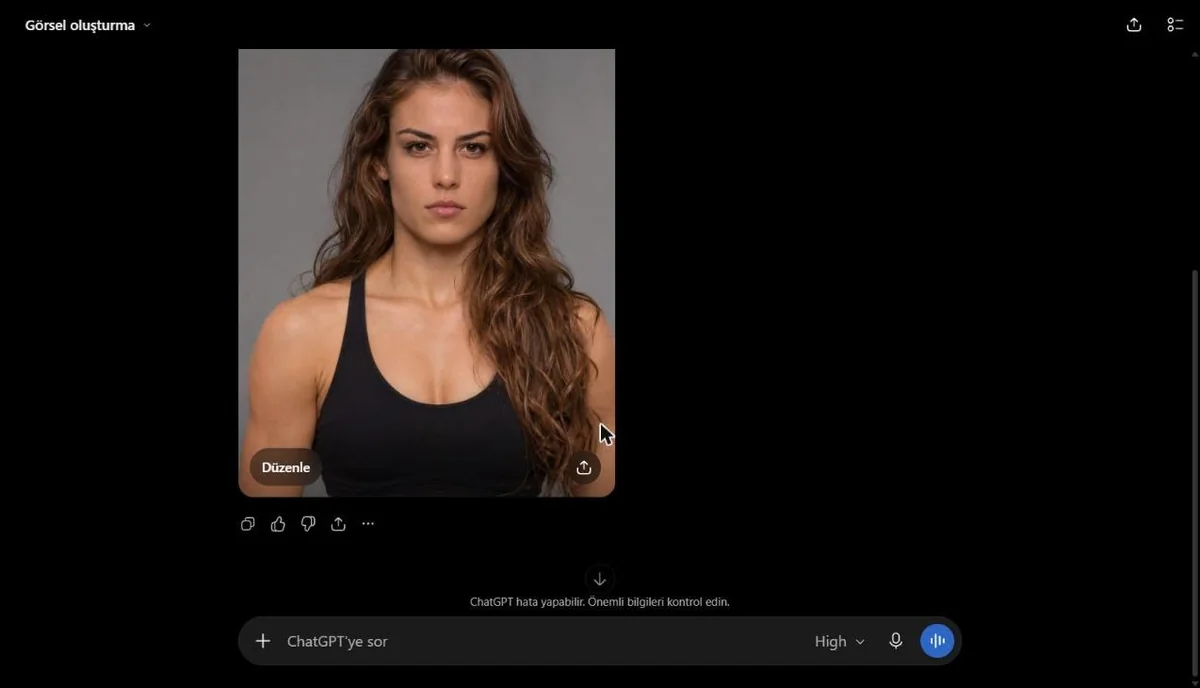
Note: Do not take a random person's photo from the internet. That photo has an owner, and the person has rights over their own face.
Step 2: Change the facial expression with Gemini Nano Banana
Open gemini.google.com in your browser and sign in with your Google account. Click the plus sign to the left of the text box and a menu opens; there you will see the file upload option and the Create image tool. Since we are editing an existing photo, uploading it is enough: when you write an edit request together with a photo, Gemini works out what to do on its own.
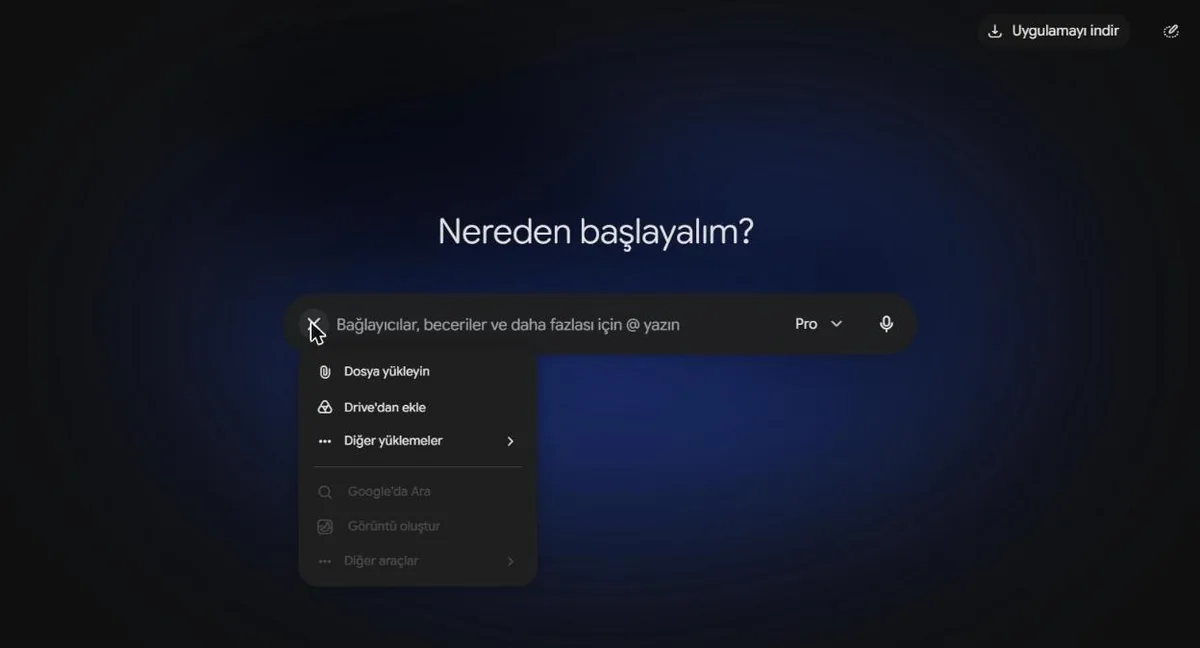
You can upload the photo in three ways: copy and paste it into the text box (Ctrl + V), drag the file onto the box, or use the upload option in the plus menu. Once uploaded, it shows as a small preview above the text box. Then we write the prompt:
To Gemini: Change the facial expression to crying. Let tears run from her eyes down her cheeks. Keep her face, hair and the background the same.
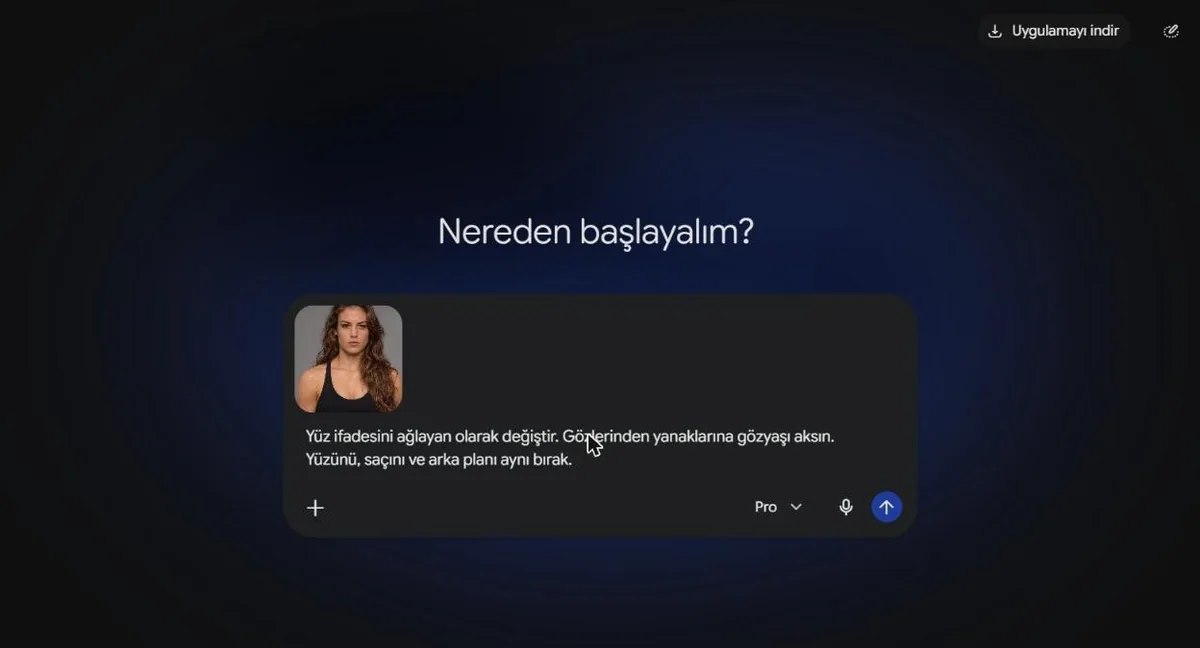
Each of these three sentences has its own job:
- What changes: the expression becomes crying.
- The detail: tears run from the eyes down the cheeks. The clearer you are, the closer the result is to what you want.
- What stays the same: the most important one. Leave it out and the AI may change the person's face too, turning them into someone else entirely.
A few seconds later the result arrives. Same person, same hair, same grey backdrop; only the expression has changed. If you do not like it, tweak the prompt and send it again, or start over in a new chat. The same way you can ask for a surprised, happy, angry or scared expression; pick whichever emotion fits your video's topic. Save the image you like at full size with the download icon in the top right.
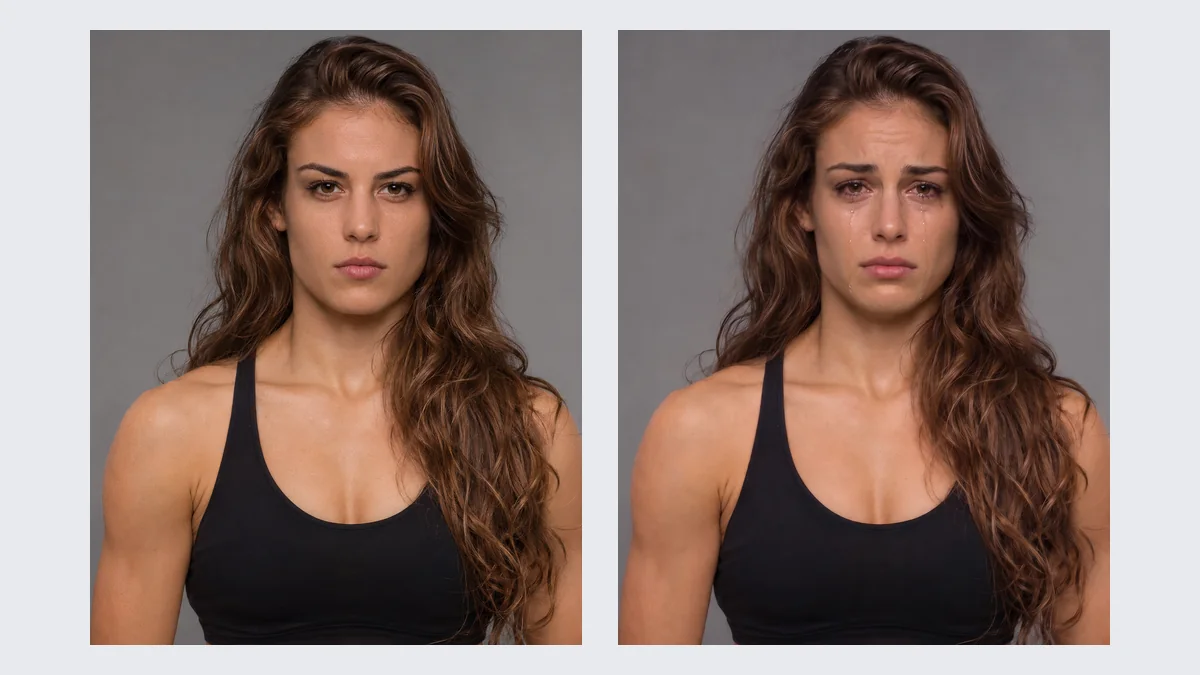
AI marking: depending on your account, Gemini may put a small star mark in the corner of the image; ours did not have one. The image also carries an invisible AI marker (SynthID) embedded in the picture. If you upload a video that uses a realistic AI image, remember to tick the AI disclosure box in YouTube Studio.
Step 3: Remove the background
A free option is remove.bg: you upload the image, the background disappears in a few seconds and the person is left on a transparent base. Watch out for two things. The free download is a small preview size (447 x 558 pixels for our image); full quality needs credits. Also, according to the site's own announcement, the tool is moving to Canva and the standalone site will no longer be available after 1 December 2026.
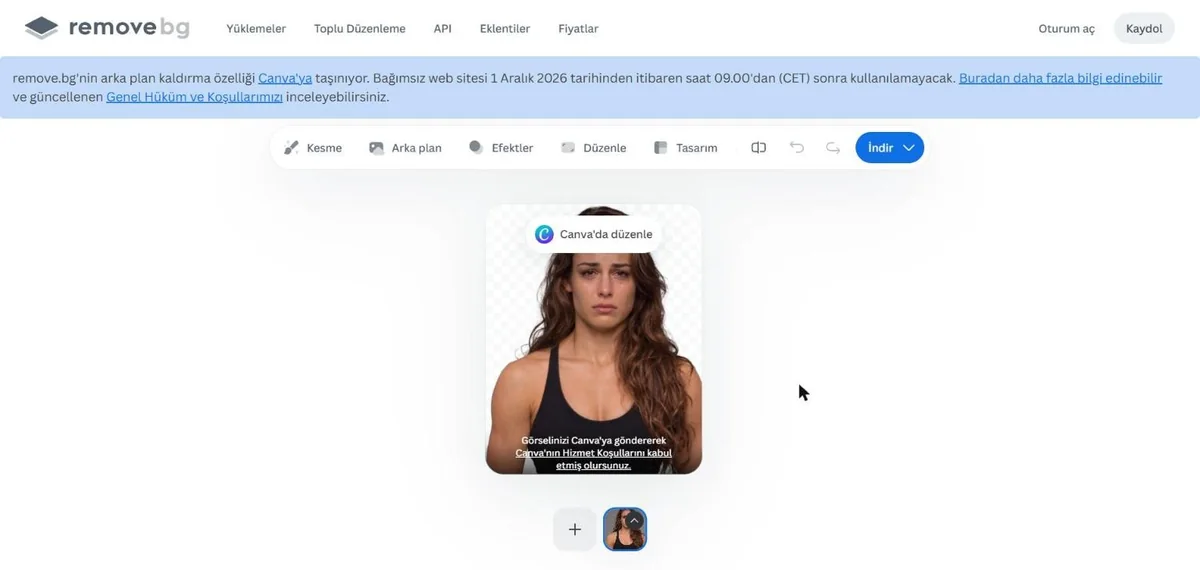
That is why we removed the background directly in Canva; Canva's Background Remover is part of the paid Pro plan and works at full quality. Why remove it at all? With the person as a separate piece, we can place them anywhere on the canvas, enlarge them and put a brand-new scene behind them.
Step 4: Place the face in the right third in Canva
Open Canva, press the Create button on the left and type "YouTube thumbnail" into the search box. The YouTube Thumbnail option opens a blank 1280 x 720 pixel canvas. That is the 16:9 size YouTube recommends. YouTube requires a minimum width of 640 pixels; 1280 is the safest choice for looking sharp on every screen.
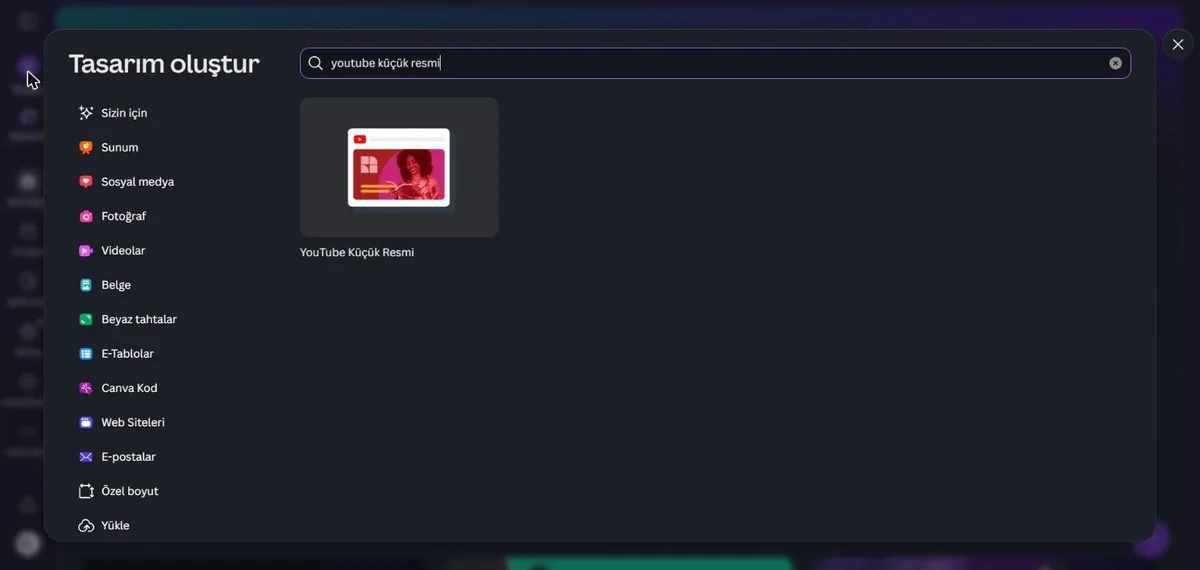
Upload the image you downloaded from Gemini in the Uploads section of the left menu and click it once to add it to the canvas. With the image selected, you will see Background Remover in the top bar; click it. Within seconds the grey backdrop is gone.
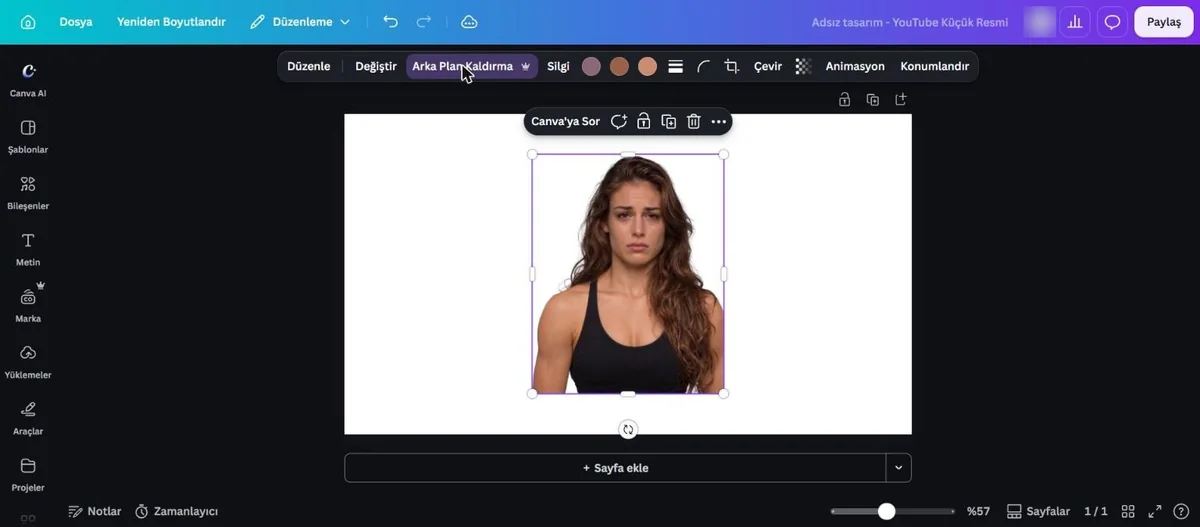
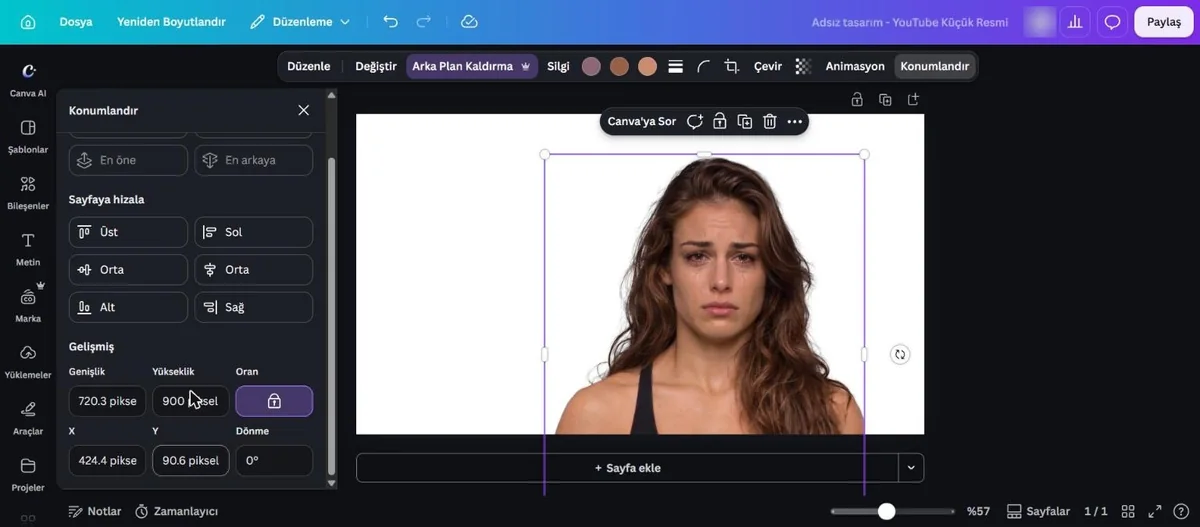
Now the most important layout rule: the face on one side, in one third; the other two thirds empty. That empty space is for the text and the scene. You can drag by hand, but for exact values open the Position menu in the top bar. Make sure the aspect ratio lock is on; otherwise the image is cropped instead of enlarged. We set the height to 900 pixels, the horizontal position to 680 and the vertical position to 0. The face got bigger, settled into the right third, and everything below chest level fell outside the canvas.
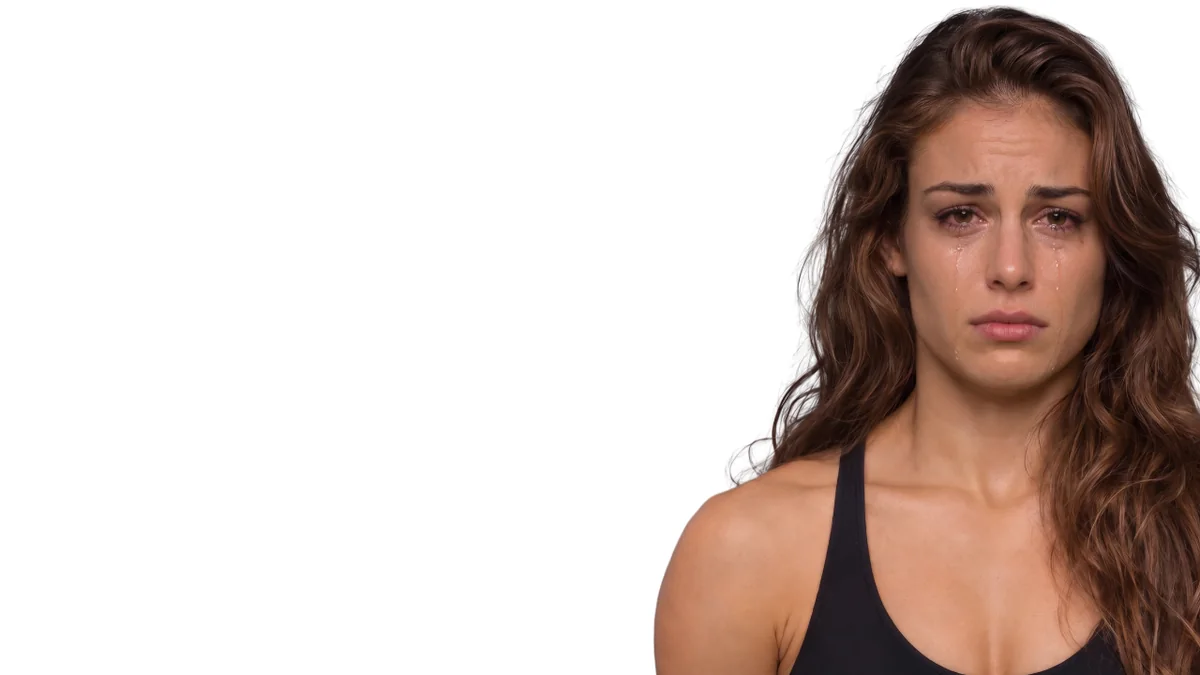
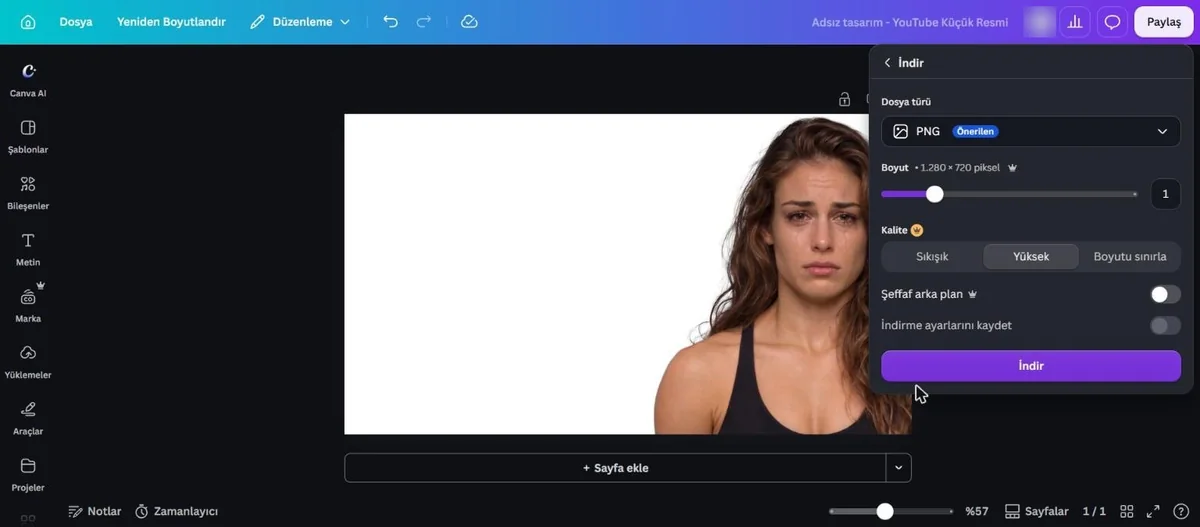
Finally, download the design: Share in the top right, then Download, file type PNG. There is a transparent background option, but you do not need it; Gemini will fill the white area in the next step.
Homework and the next lesson
Repeat the four steps with your own photo or an AI-generated person: pick the photo, change the expression in Gemini, remove the background and place the face in the right third in Canva. Try a surprised expression too and put the two results side by side; see which one makes you more curious.
In the next lesson we upload this image back to Gemini and turn it into a finished thumbnail with a single prompt: describing the thumbnail text, where it goes, keeping the face intact and the scene behind it, all in one prompt.
Read lesson 2: A YouTube Thumbnail with One Gemini Prompt: AI Thumbnail Lessons 2
Sources and related pages
- Google Gemini
- remove.bg (the Canva move is announced on the site)
- Canva
- YouTube Help: Add video thumbnails (1280 x 720, minimum width 640 pixels)
- How to use Google Gemini in 2026
- TurkWebSite on YouTube: the thumbnail lesson videos (in Turkish).
You make the thumbnail, we build the site
Once your videos start getting views, viewers need a website to go to. TurkWebsite builds yours with affordable web design and free hosting.