
















How to Set Up Email With Your Own Domain: A Guide to Your Sending Infrastructure
How to build email infrastructure on your own domain for newsletters and business correspondence: choosing a domain, business email options, DNS records and why bulk sending should go through a marketing service rather than your business email.

You've chosen your niche, learned how to build an opt-in list, you keep your list clean and the offer for your subscribers is ready. Now it's time to set up the infrastructure your emails will travel on. This part may look technical, but once it's set up correctly, it runs smoothly for years.
The English source lesson picks Google's business suite for this: a domain is bought, a Google Workspace account is opened, the domain is verified and incoming email is routed to Gmail. The lesson's goal is ambitious: "build a system that automatically sends thousands of emails a day."
In this guide we walk through the steps of setting up email with your own domain in order. But first we clarify an important distinction: business email used for one-to-one correspondence and an email marketing service that sends newsletters to your subscribers are not the same job. When you use each in the right place, you protect your reputation and stay within the rules.
This article is the sixth part of our Making Money Online and Email Marketing Guide series. In previous parts we covered the basics, building an opt-in list, email finder tools, list cleaning and the irresistible offer.
In short:
- Professional sending requires your own domain. A personal Gmail address doesn't inspire trust, and you can't manage the technical authentication settings.
- Business email (Google Workspace, Microsoft 365, Zoho Mail, hosting email) is for one-to-one correspondence. Google Workspace limits each user to 2,000 messages a day, and its usage policy prohibits unsolicited bulk email.
- Send newsletters and campaigns with an email marketing service, verifying your own domain in that service.
- Setup order: domain, provider, ownership verification, MX records, SPF, DKIM and DMARC, and finally testing.
- Google Domains, used in the lesson, no longer exists: Google handed the business over to Squarespace in 2023.
What's in this guide?
- Why should you send email from your own domain?
- Where and how to choose a domain
- Two different jobs: business email and bulk sending
- Business email options
- Step-by-step setup
- How to choose the sender name and address
- First sends from a new domain
- Common mistakes
- Conclusion and the next part of the series



Why should you send email from your own domain?
As the lesson also stresses, promoting a product or course from an address like name.surname1985@gmail.com doesn't look professional. But it isn't only about appearance:
- Trust: An address like merve@yourbrand.com tells people at a glance who is writing and which business they represent.
- Technical authentication: You can only set up SPF, DKIM and DMARC records on a domain you own. Gmail requires senders to use at least SPF or DKIM, and those sending more than 5,000 messages a day to set up all three.
- Portability: When you change email provider, your address stays the same. You don't need to announce a new address to your subscribers and customers.
- Control: You can create new addresses for your team, and close the address of someone who leaves while keeping their correspondence.
Where and how to choose a domain
A good domain is short, easy to say and spell, and the same as your brand. A few practical rules:
- Avoid special characters. Domains with letters like ç, ğ, ı, ö, ş or ü may display differently on some systems and are hard to type as an email address.
- Avoid hyphens and numbers. They cause confusion when you say the address over the phone.
- Choose the extension for your audience. A country extension (such as .com.tr for Turkey) suits a local audience, while .com is the common choice for international work.
- Check the renewal price. Offers like 1 dollar for the first year apply to the first year only; we covered this in the previous part.
- Register the domain in your own name. A domain registered in an agency's or designer's name can cause ownership problems.
In the lesson, the domain is managed through Google Domains. That service no longer exists: Google transferred its domain business to Squarespace in 2023, and the migration of registered domains was completed in 2024. Today you do the same steps in the DNS management screen of the company you bought your domain from.



Two different jobs: business email and bulk sending
The most common mistake when setting up sending infrastructure is trying to do two different jobs with one tool.
| Business email | Email marketing service | |
|---|---|---|
| What for? | One-to-one correspondence with customers, suppliers and partners | Newsletters, welcome series and campaigns for subscribers |
| Example tools | Google Workspace, Microsoft 365, Zoho Mail | MailerLite, Brevo, Mailchimp |
| Sending volume | Daily limits, set for personal correspondence | Planned bulk sending based on number of subscribers |
| Unsubscribe | None, handled manually | Automatic unsubscribe link in every email |
| Consent and opt-out records | Not kept | Signup source, consent and opt-out history are recorded |
The approach in the lesson: thousands of emails from Google Workspace
The lesson says Google is a trusted system, so bulk sending can also be done through Gmail. Google's own rules don't support this:
- According to Google Workspace sending limits, each user can send at most 2,000 messages a day; 1,500 for mail merge and 500 for trial accounts.
- The Google Workspace acceptable use policy explicitly prohibits sending unsolicited bulk email, promotions and advertising ("spam"). Misuse can lead to the account being restricted.
In other words, Google Workspace is a reliable business email infrastructure for your work, but it isn't designed for sending campaigns to thousands of people. Use an email marketing service for your newsletter and verify your own domain in that service.
Business email options
The information below comes from the providers' own pages as of November 2026.
| Option | Highlights | Cost |
|---|---|---|
| Google Workspace | Gmail interface, 30 GB per user, Drive and Meet | Starter plan from 71.20 TL per user per month in Turkey (excluding tax) with an annual commitment |
| Microsoft 365 | Outlook interface, integrated with Office apps | Paid plans per user per month |
| Zoho Mail | Free plan for up to 5 users on a single domain, 5 GB per user | No IMAP or POP on the free plan; paid plans offer more |
| Hosting email | On the same server as your website, included in most packages | May have no extra cost; delivery success depends on the server's reputation |
When choosing, don't look only at the price but also at which interface your team is used to, the phone app and your backup needs.



Let us connect your business email to your domain
Addresses on your own domain, MX, SPF, DKIM and DMARC records, device setup and migration of your old mail. Let your emails reach the inbox.
Setting up email with your own domain: step by step
Whatever the provider, setup follows the same order. The screens may differ, but the logic is the same.
1. Get the domain
Buy your domain from a registrar and make sure you can access its DNS management screen. All of the setup records will be entered there.
2. Choose a provider and open the account
When opening a business account with Google Workspace, Microsoft 365 or Zoho Mail, select the "I have my own domain" option and set your first user address. We explain which address to use in the "Sender name" section below.
3. Verify domain ownership
The provider gives you a TXT record. You add it to your domain's DNS settings; when the provider sees the record, it knows the domain is yours. The change usually shows up within minutes, but DNS can take up to 48 hours to propagate everywhere.
4. Enter the MX records
MX records tell which server receives the email sent to your domain. Add the MX records your provider gives you and remove any old, different MX records; otherwise some email may go to the old server.
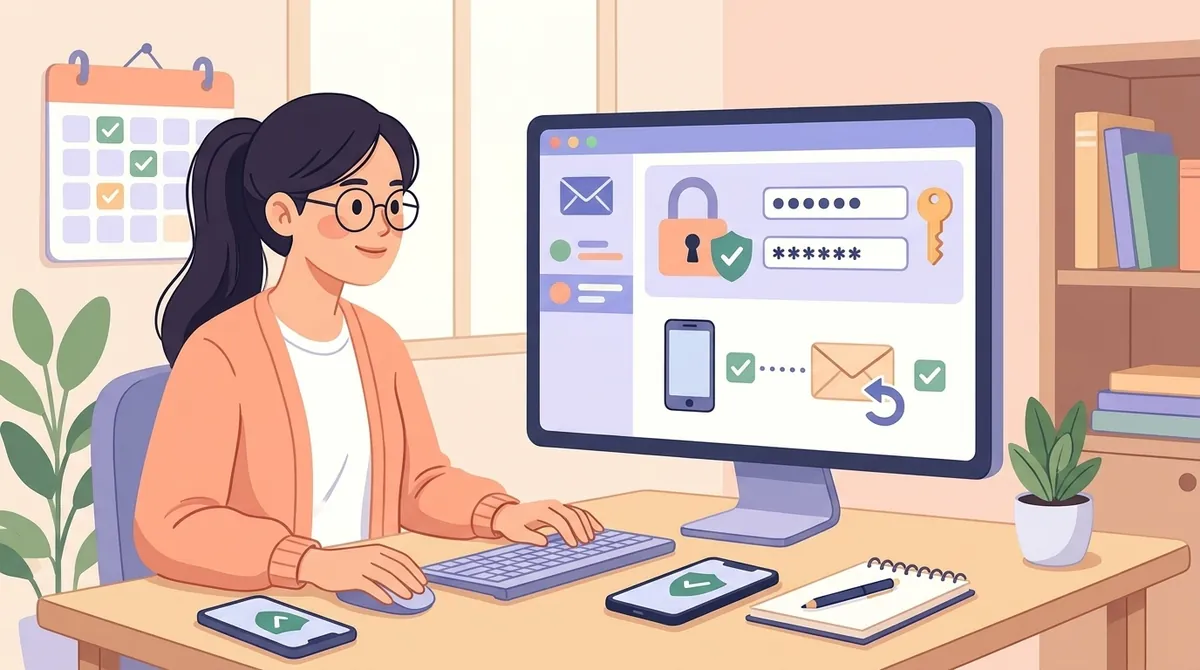
5. Add SPF, DKIM and DMARC records
- SPF: Lists which servers may send email on behalf of your domain. A domain should have only one SPF record; if you use several sending services, add them all to the same record.
- DKIM: Signs the emails you send digitally. Your provider generates the key, and you add it to DNS.
- DMARC: Says what to do with emails that fail SPF or DKIM. You can start with a "none" policy and tighten it after monitoring the reports.
We'll cover the detailed setup of these three records, and how to get a full score with test tools, in the next part of the series.
6. Verify your domain in the email marketing service
Add your sending domain in MailerLite, Brevo or Mailchimp. The service gives you its own DKIM records and, if needed, SPF records; once you add them to DNS, your newsletter goes out signed on behalf of your own domain.
7. Test
Send an email from your new address to a personal Gmail and an Outlook address. In Gmail, open the message and choose "Show original": you should see "PASS" on the SPF, DKIM and DMARC lines.
Quick note: Many email marketing services recommend using a subdomain such as news.yourdomain.com for newsletters. That way, possible problems with campaign sends affect the reputation of your day-to-day business correspondence somewhat less.


How to choose the sender name and address
The lesson says "info@ or admin@ is too boring; pick a fun address that gets people to open". Sparking curiosity is a good idea, but what really works in sender details is recognition:
- Sender name: Person and brand together: "Merve, Vegan Kitchen". People open emails from people more than from companies.
- Address: A clear, permanent address such as merve@ or news@. Don't change it often; an address subscribers recognise earns trust.
- Reply-to address: Choose an address where you'll read the replies. "noreply" addresses stop readers from writing to you, while replies from subscribers are valuable feedback and show the correspondence is wanted.
- Signature: Your name, brand, website address and, if needed, contact details.
First sends from a new domain: start slowly
A new domain has no sending history yet. Email providers are cautious with the messages you send in the first weeks. So send your first newsletter to your most engaged subscribers in small groups, and monitor bounces and complaints. We'll explain separately in later parts how to increase sending volume gradually, in other words how to "warm up" the domain.
Quick note: If your subscriber and customer data is stored on servers abroad, also consider the cross-border data transfer rules of the privacy law that applies to you (for example KVKK in Turkey or the GDPR in Europe), and state in your privacy notice which service providers you use. This note is general information and not legal advice.
An illustrative example: two wrong starts, one correct setup
This story is fictional and meant to illustrate the method; names and numbers are examples.
Kerem started sending a newsletter for his handmade ceramics shop from his personal Gmail address. Part of his first email, sent to 300 people in BCC, landed in spam, and he had to remove the people who wanted to unsubscribe by hand.
Then he bought a domain and opened a Google Workspace account. This time he put his list in a spreadsheet and tried sending with mail merge; he hit the daily limit and realised his account was exposed to a policy violation.
On his third attempt he separated the jobs: his Workspace address kerem@ stayed on the domain for customer correspondence. For the newsletter he opened a MailerLite account, verified a news subdomain and added SPF, DKIM and DMARC records. The test email showed "PASS" on all three lines, and he sent the first newsletter to his 100 most engaged subscribers first.



Common mistakes
- Sending the newsletter from a personal Gmail address in BCC
- Using a business email account as a bulk campaign tool
- Registering the domain in someone else's name
- Adding more than one SPF record to a domain
- Forgetting to delete the old MX records
- Sending from a "noreply" address and stopping readers from replying
- Sending to the whole list on the first day with a new domain
Related pages and links
- Part 2 of the series: How to build an email list from scratch
- Part 4 of the series: How to clean an email list
- Part 5 of the series: How to create an irresistible offer
- Business email setup: SPF, DKIM and DMARC configuration
- SMS and email notification integration
- Website design: a professional site on your own domain
Conclusion: two tools, one domain
Your own domain is essential for a professional email infrastructure. Use business email such as Google Workspace, Microsoft 365 or Zoho Mail for your one-to-one correspondence, and an email marketing service for the newsletters you send to subscribers. When both are set up on the same domain with the right DNS records, your emails set off safely.
What's in part seven of the series?
In the next part we'll set up SPF, DKIM and DMARC records step by step and explain how to measure your emails' deliverability score with tools like MX Toolbox and mail-tester. You can follow the TurkWebsite blog for our other articles.
Next in the series: Part 7: How to Set Up SPF, DKIM and DMARC
Your domain, website and email in one place
Let's set up your website, signup page and business email together on the same domain. Get affordable web design from TurkWebsite; as long as your site stays on our server, you don't pay for hosting. The domain is registered in your name and you pay for it.
Legal notice: This article is for general information and is not legal advice. Service prices, limits and regulations may change; check current sources before putting this into practice. Last updated: 3 November 2026.